Getting Started
Copy and paste a few lines of code to get set up
By adding a simple widget to your index page, you can unlock the following functions:
Buy
Simplify the purchasing process for your users.
Unlock Content
Seamlessly manage content purchases and access across devices.
How It Works
Content Setup
Choose the content you want to sell and how much to sell it for. Assign a unique content_id and price to each content item.
User Purchase
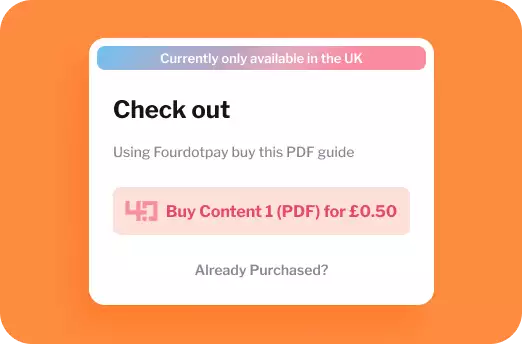
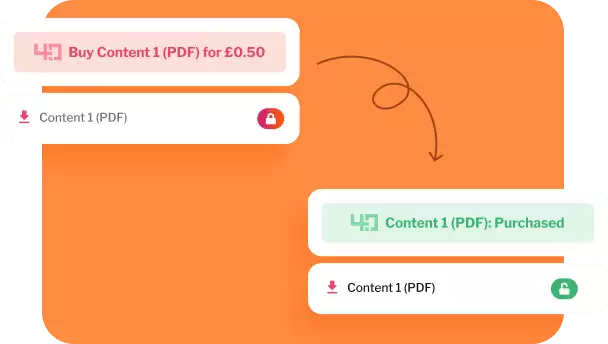
When a user clicks the Buy button the Fourdotpay payment flow is triggered. Fourdotpay informs your website when the payment has gone through.
Content Access
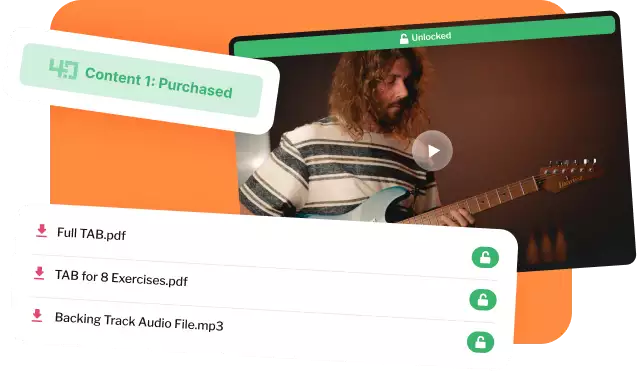
Users can easily regain access if they switch devices using the redeem function.
License Verification
Users purchase a license to access content. Every time a page loads, the license is verified through our API.
Guided simple example
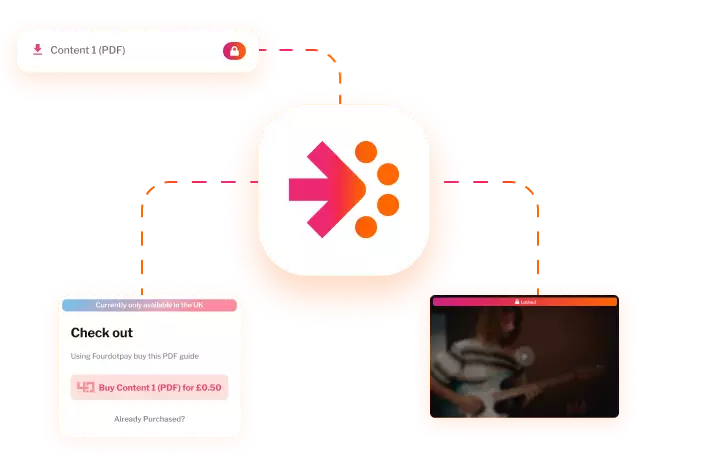
We’ll start with a simple example of adding a Buy button to your website to allow your customers to buy access to a single video for £2.99. In the image below, you can see what we are going to build – a button that lists the price to access a video and a video in the locked state (which user cannot play until they make the payment). The guide shows the three components needed to enable the purchase journey ( 1. Checkout container, 2. Buy button, 3. Content container).
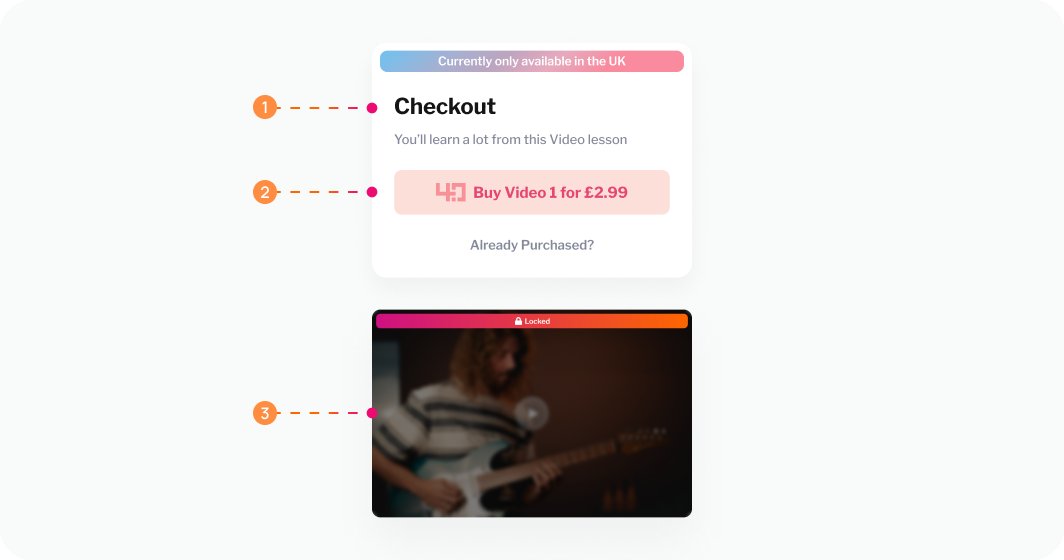
The first code snippet below creates the first component – the Checkout container :
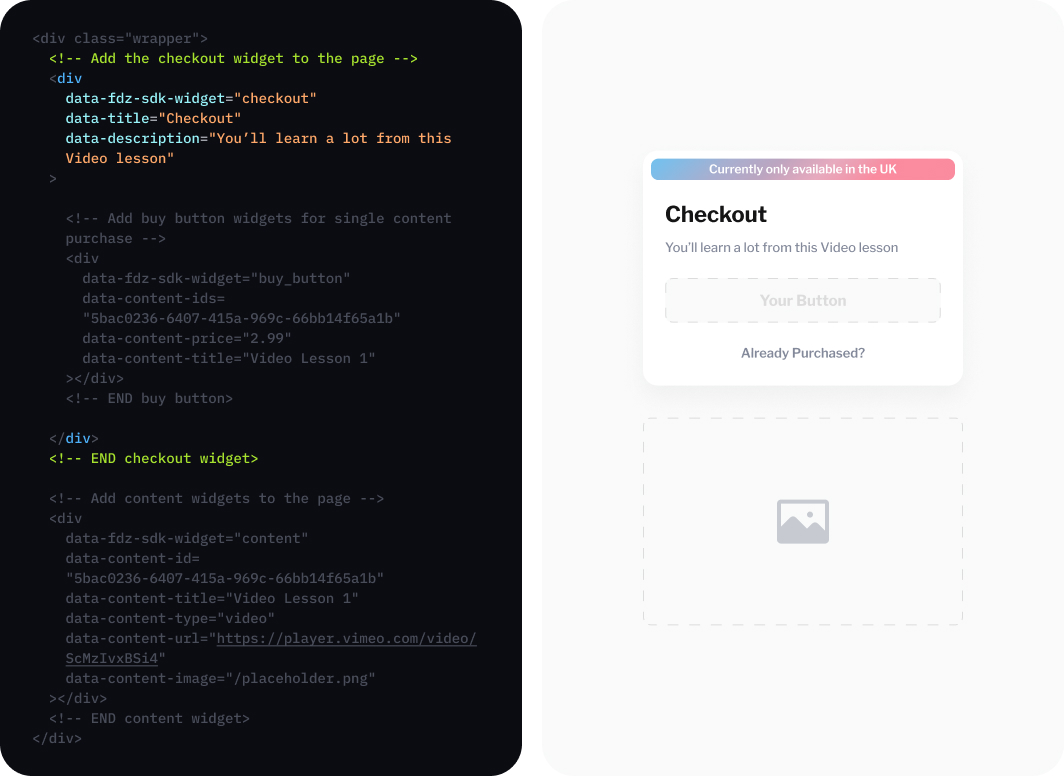
The code snippet below adds a Buy button to checkout container. You can add multiple Buy buttons if you like:
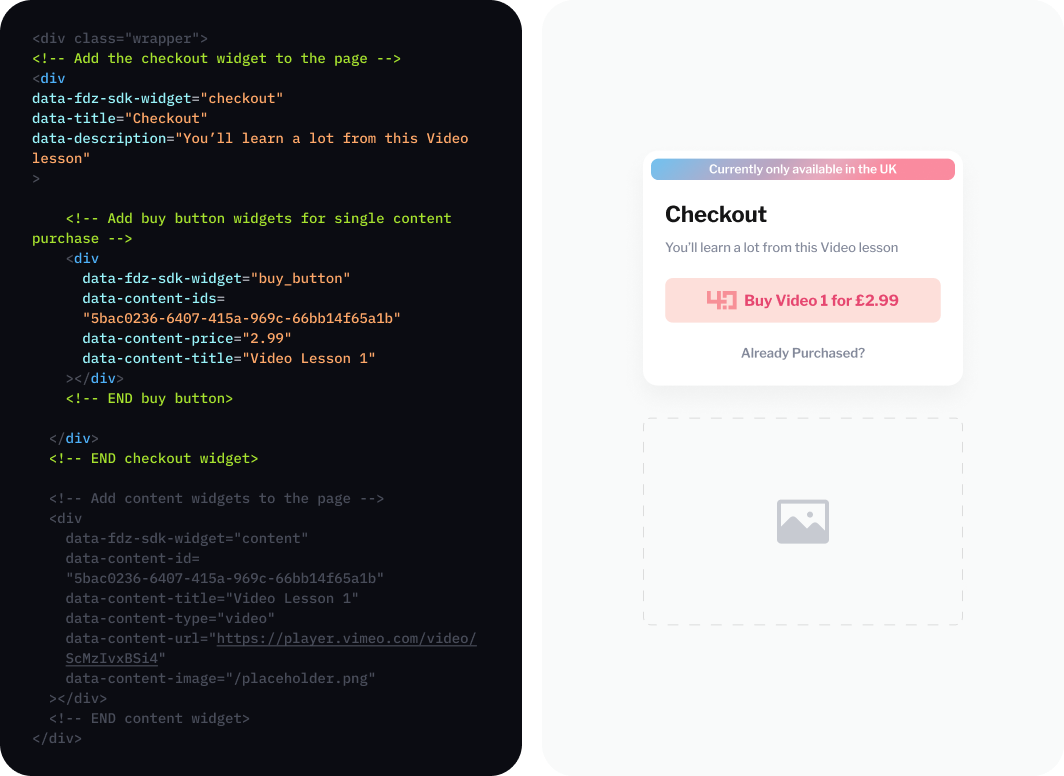
Finally, the code snippet below adds the third component – the content container:
Make data content ID in buy button match data content ID in content container
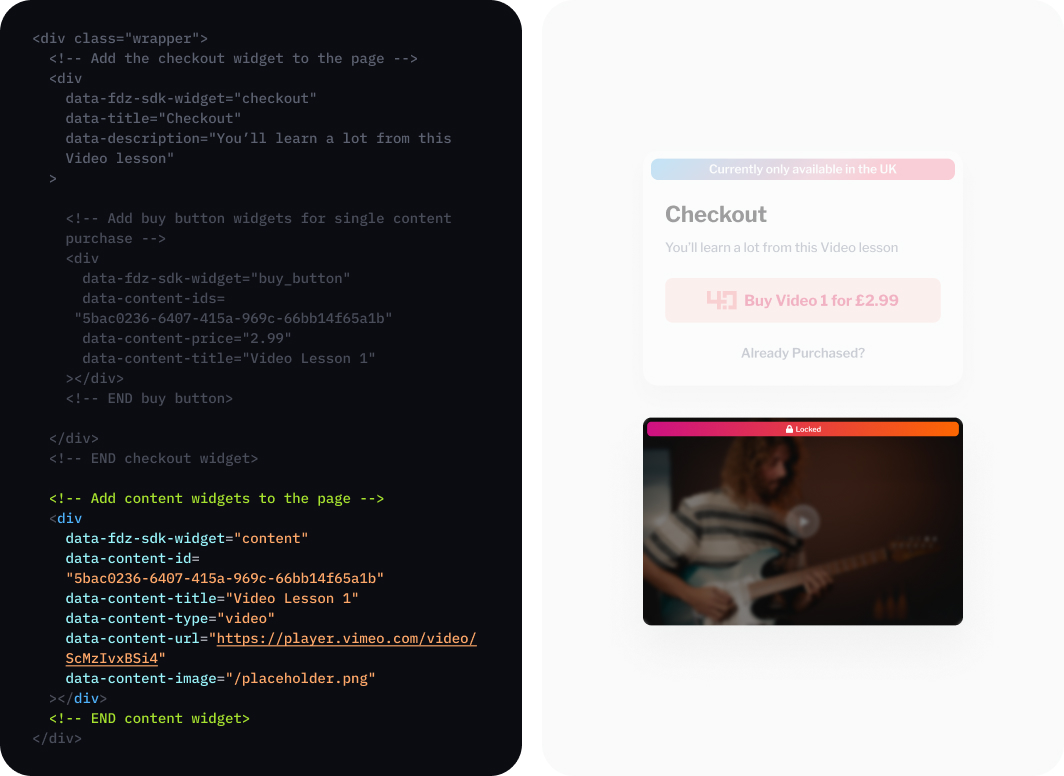
When the user clicks Buy, they will be shown a popup explaining how to purchase the content using Fourdotpay. Our SDK takes care of the presentation of that page. After the user has made the purchase, the video will show in the unlocked state.

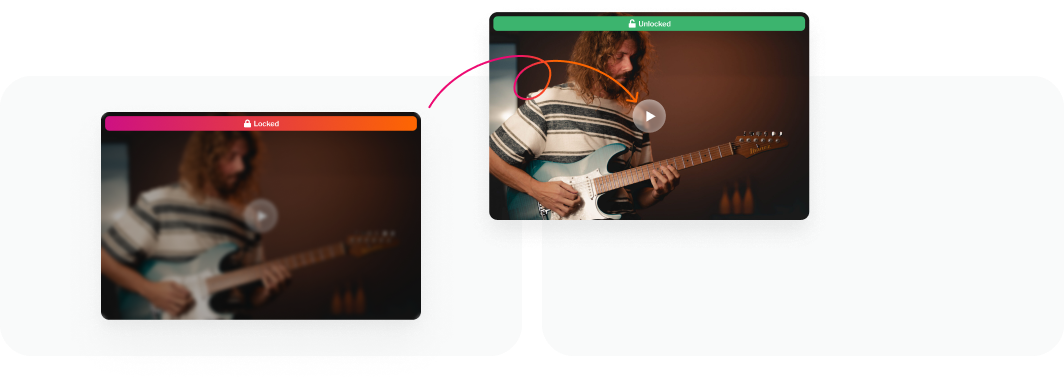
Now that you understand the basic idea, below we go into more detail. In step one, you’ll configure the set up code in the of your webpage. In step two, you’ll configure the code snippets in the of your website:
Copy and paste setup code into the HEAD of the page on your website.
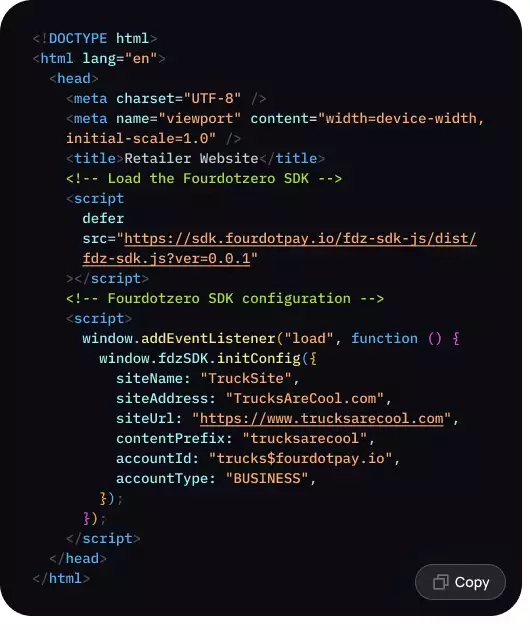
When inserting this code snippet into the HEAD of your page, you need to customise the information to make it relevant to you:
siteName: This is a string that describes your website.
siteAddress: e.g. example.com. This is a string representing the main part of your domain name (Second-Level Domain) and the Top Level Domain (e.g. .com, .co.uk, .io etc).
siteUrl: The full url of your website. This should be a fully formed URL e.g. “https://www.trucksarecool.com”.
contentPrefix: This is a string that you can choose to easily identify your website to Fourdotpay.
accountId: This is your 4.0 Account ID (ie. the account ID you chose when you opened your Fourdotpay payment account). This tells the system where you want the money to go when a user buys your content.
accountType: This can be either “PERSONAL” or “BUSINESS”. It specifies the account type of the Fourdotpay account into which you want funds to be sent when a buyer purchases your content.
Copy and paste the Checkout container, buy button and content container code into the BODY of the page on which you want to sell your content:
<div class="wrapper">
  <!-- Add the checkout widget to the page -->
  <div
    data-fdz-sdk-widget="checkout"
    data-title="Checkout"
    data-description="You'll learn a lot from this Video lesson"
  >
    <!-- Add buy button widgets for single content purchase -->
    <div
      data-fdz-sdk-widget="buy_button"
      data-content-ids="5bac0236-6407-415a-969c-66bb14f65a1b"
      data-content-price="2.99"
      data-content-title="Video Lesson 1"
    ></div>
    <!-- END buy button -->
  </div>
  <!-- END checkout widget -->
  <!-- Add content widgets to the page -->
  <div
    data-fdz-sdk-widget="content"
    data-content-id="5bac0236-6407-415a-969c-66bb14f65a1b"
    data-content-title="Video Lesson 1"
    data-content-type="video"
    data-content-url="https://player.vimeo.com/video/ScMzIvxBSi4"
    data-content-image="/placeholder.png"
  ></div>
  <!-- END content widget -->
</div>
When inserting this code snippet into the BODY of your page, below is some guidance on how to choose values for these properties:
data-fdz-sdk-widget="checkout"
will generate a container in which you can place one or more buy buttons. To customise the text that appears in this checkout box, provide a value for data-description. You can also edit data-content-title.
data-fdz-sdk-widget="buy_button"
will generate a buy button for one or more pieces of content. Use a Universally Unique Identifier will generate a buy button for one or more pieces of content. Use a Universally Unique Identifier (UUID) to identify one piece of content related to that buy button (For example, in a Terminal on Mac you can run the command “uuidgen” to generate one). If the buy button allows the user to buy multiple pieces of content, then specify more than one UUID for the field data-content-ids. To assign a price to the content item or group of items, enter a value for data-content-price.
How do I generate a UUID? There are various tools you can use to generate UUIDs, for example, UUID Generator: https://www.uuidgenerator.net/version4. You must use a UUIDv4 generator and don’t try to manually reuse/edit UUIDs.
data-fdz-sdk-widget="content"
will generate a container with the content you are selling. If a user has not purchased the content, the content will appear in its locked state. Specify a data-content-id for the content item (ie. IMPORTANT: you must use the same UUID you specified in the Buy Button above). The allowed values for data-content-type are “video”, “pdf”. Provide a URL for where the content is hosted (e.g. If the content is a video hosted on Vimeo then specify the vimeo URL).
<title>Retailer Website</title>
<!-- Load the Fourdotzero SDK -->
<script
  defer
  src="https://sdk.fourdotpay.io/fdz-sdk-js/dist/fdz-sdk.js?ver=0.0.1"
></script>
<!-- Fourdotzero SDK configuration -->
<script>
  window.addEventListener("load", function () {
    window.fdzSDK.initConfig({
      siteName: "TruckSite",
      siteAddress: "TrucksAreCool.com",
      siteUrl: "https://www.trucksarecool.com",
      contentPrefix: "trucksarecool",
      accountId: "trucks$fourdotpay.io",
      accountType: "BUSINESS",
    });
  });
</script>
Getting deeper
Service Introduction
Your needs may be more complicated than the simple use case above. This section explains the services we offer and how to use our APIs to create useful integrations with those services.
Fourdotpay offers three main services:
Payment Service: Provides capabilities for making and settling payments (e.g. transfer of funds from buyer to seller). Payments are handled via a “Wallet Provider” (e.g. Fourdotpay) and both the buyer and the seller create accounts with the Wallet Provider.
Content & Paywall Service: Provides capabilities to generate Buy buttons (payment links) for individual content items or groups and to ensure that only content that has been purchased is unlocked and available to view.
Licensing Service: Provides capabilities for issuing and managing licences (e.g. keeping track of who has paid for which content items). Licences can be set up to limit access to content by time or number of uses.
You don’t have to use all of these services. Whilst the Payment Service and Content & Paywall Service must be used, if you have your own license management system you can integrate that with our services.
Key User Flows
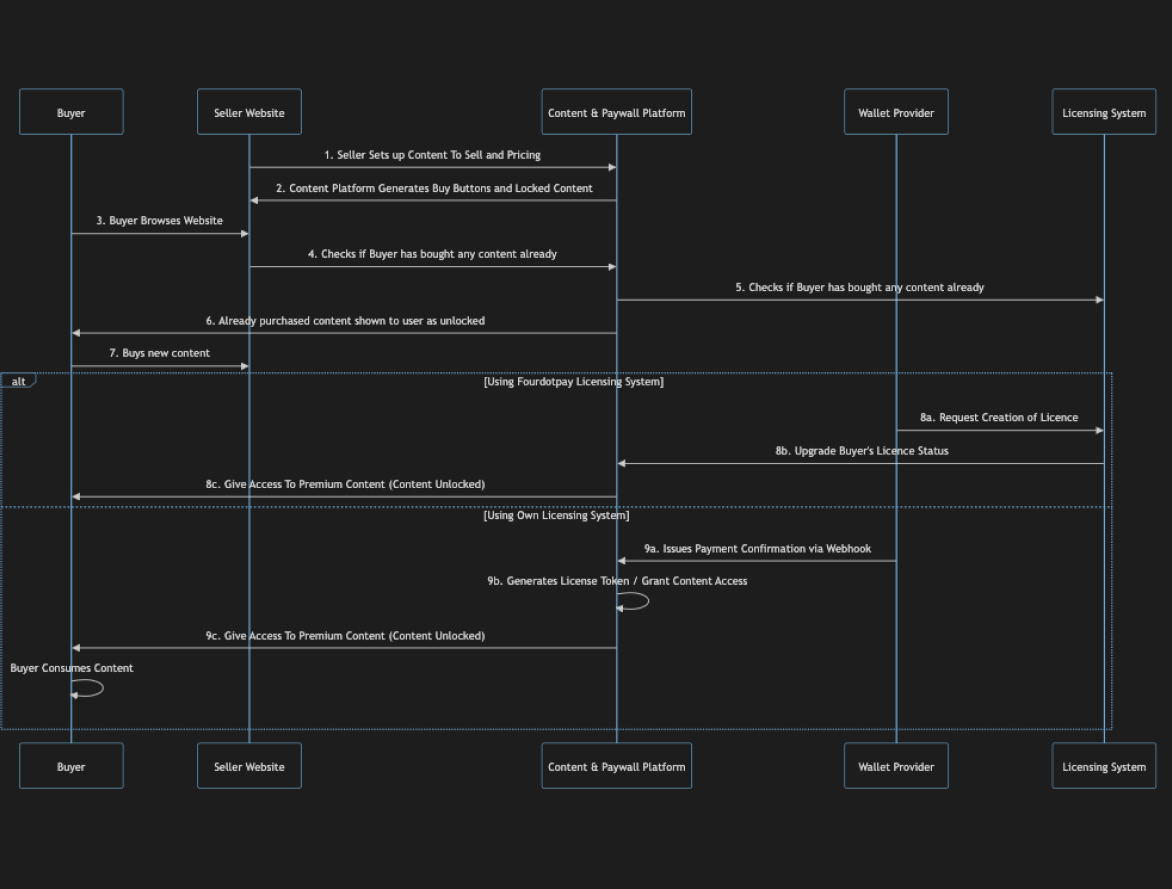
This section outlines the key user flows that are supported by our services. The sequence flow below shows the key flows.
When a potential Buyer arrives at the Seller Website, a check can be made to see if they have already purchased the content being sold on the page and if so, previously purchased content will be denoted as “Purchased” to the user.
If they are buying new content, the Buying & Paying flow is triggered.
Buying & Paying Flow
This flow starts when a purchaser clicks on a content item (or group of items) to buy for a price specified on the seller’s website.
If the buyer is using the Fourdotpay (‘Wallet Provider’) web app or Chrome extension and has already created a Fourdotpay account, they are presented with a payment request asking them to confirm the amount of the payment and the recipient 4.0 Account ID.
If the buyer prefers to pay via the Fourdotpay iOS or Android mobile app, they can scan a QR code shown on the seller’s website, generated by our SDK. Scanning of this QR code results in the presentation of a payment request for that amount inside the buyer’s Fourdotpay wallet in the Fourdotpay mobile app.
Once the Buyer confirms the payment and Fourdotpay (‘Wallet Provider’) confirms that the payment has settled successfully, a call is made to our Licence Service to request a licence for the purchased content item or items. Alternatively, you can opt to call your own Licence service if you have one.
A licence is issued by the Licence Service to the buyer. The Wallet Provider also issues a Payment Confirmation via Webhook to the Content & Paywall service which then grants access to the content to the buyer and informs them that the content is ready to view.
The buyer can then consume the content they have just purchased.
Check Licence & Redeem Flow
When a Buyer purchases a particular group of piece of content, the Content & Paywall Service can be used to change the state of Buy Buttons to indicate that that user has already purchased that item.

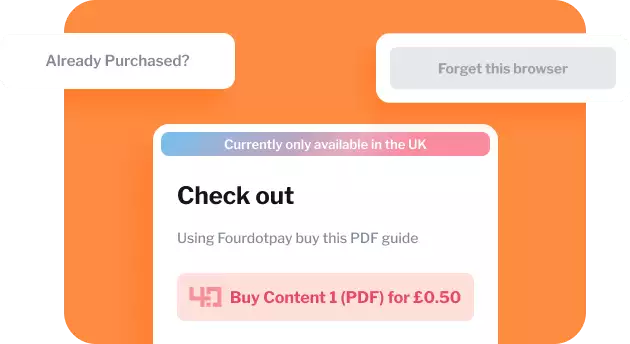
If the user is using a different browser to the one they used when they made the purchase, and your website doesn’t have a user management capability, a redeem flow is available and can be triggered when the user clicks the «Already Purchased?» link shown on the seller website (and generated by our SDK). They are prompted to log on to their Fourdotpay wallet (if they have our Chrome extension installed) or to provide their email address and verify their identity and resolve their Fourdotpay Account ID.

If the Licence Service determines that the user owns a Fourdotpay account which has previously purchased the content, then the Content & Paywall Service grants access to the content.
Forget Me Flow
By default, the browser remembers previous purchases and grants access to content via that browser. The user can clear this information by clicking a «Forget This Browser» button shown on the seller website (generated by the SDK if you want it displayed). The Buy button state will change from Purchased to Buy.


Explore Our API
You can build a digital content sales platform with our APIs. Check out our API documentation below to enable you to integrate our services with yours.
**SWAGGER HERE**
Coming Soon
Fourdotpay Creator Gems - Unearth +25% More Value!
Showcase your premium content through Creator Gems and start earning more!
Register your details now.
Register your details now.

Our Blog
Read more articles
The Creator Monetisation Roadmap: From Friction to Frictionless Revenue
How smart creators are building sustainable income streams by eliminating payment barriers and maximising every transaction.
09/06/2025

Creators Join The FourDotPay 1% Club: How Creators Are Saving Over 25% on Payment Fees
Creators are discovering how to keep more of your hard-earned revenue whilst making purchases effortless for their audience via the FourDotPay 1% Club.
05/06/2025

Creator Audience Relationship – Your Data, Your Future, Own It!
Who truly owns the Creator Audience Relationship, and in particular, the data?
27/05/2025
